Tuesday, December 29, 2015

Maple-Thyme Chicken Thighs

This is the last recipe from the Oct/Nov Simple & Delicious issue that I'm trying.  Then onto the next one, which has a bunch of stuff I want to try.  Plus I got a great Taste of Home cookbook from my mom for Christmas this year that I'll be starting soon...woot! 

This recipe came together really quickly.  I made it on my George Foreman grill.  In case you haven't heard about my love affair with George...I got my first one (for free) at a yard sale several years ago.  I loved it, but hated washing it because it didn't have removable plates and couldn't be submerged.  I was practically standing on my head in order to wash it thoroughly without getting the dang heating element wet.  After a couple of years and a lot of neck cramps, I got a new one at Target with removable plates, which are also dishwasher safe.  This was a huge improvement.  But now my love for this one is growing cold, for two reasons...it's kind of on the small side, and now that the kids are bigger and eating more, it would be nice to be able to make more at one time.  And we have people over and I'm planning to use it, I have to cook in batches, which takes longer (obviously).  And also my husband's friend says he has one that has different temperature settings.  Mine has two: off and on.  And it gets really hot, and quite often the outside will be very done while the meat thermometer does not yet say the safe eating temperature.  You'll see this in the last picture on this recipe.  So I'll be keeping my eyes open over the next few months to see how expensive an upgrade will be.  I do use it a few times a month so I feel like I can justify it :)

Maple-Thyme Chicken Thighs
2 tbsp stone ground mustard
2 tbsp maple syrup
1/2 tsp dried thyme
1/2 tsp salt
1/2 tsp pepper
6 boneless skinless chicken thighs

In a small bowl, mix the first five ingredients.


Moisten a paper towel with cooking oil; using long-handled tongs, rub on grill rack to coat lightly (or just spray your Foreman grill with cooking spray...easier).

Grill chicken, covered, over medium heat 4-5 minutes on each side or until 170.  Brush often with mustard sauce during last 4 minutes of cooking.
This was after 4 minutes.  I sauced it, then flipped it, and sauced it again.  Some were still not 180 with meat thermometer.  So I waited longer.  Here's one of the finished plates.
You can see that it is a bit darker than would be ideal.  Also the kids noticed that.  Maybe one of them said "mom, that is black."  I think it would look like this on a normal outside grill, too, but I guess it would taste like barbecuing then and they wouldn't complain.  We had this with green beans and fake potatoes (don't judge, I LOVE fake potatoes...and the Idahoan brand is gluten free).

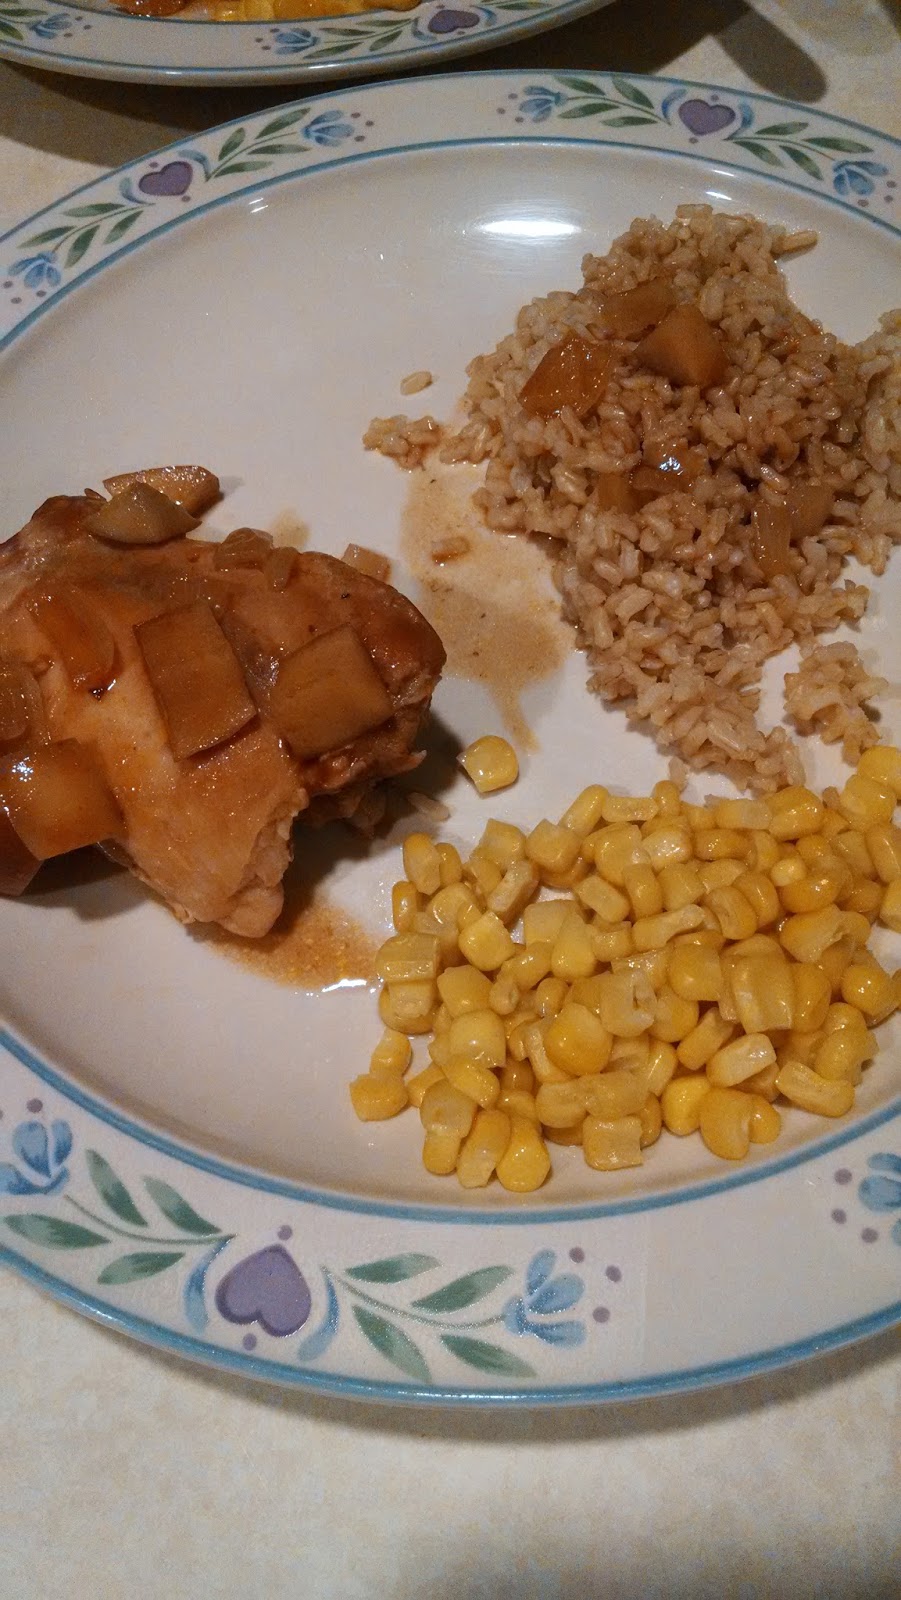
So overall, I am happy with how quick this came together...like a 5 minute prep time.  It wasn't a big hit among certain of the children.  Not sure if it was the mustard flavor (which wasn't really very strong since I used whole grain mustard) or the "black"ness.  Oh well.


Sunday, December 27, 2015

Loaded Tater Tot Bake

Now that I'm not working every Sunday anymore, I have time to make things for lunch that take a bit longer.  Like this.  It has a brunchy feel, even though it has tater tots in it.  It's from the Oct/Nov 2015 Simple & Delicious.

Loaded Tater Tot Bake
1 tbsp canola oil
1 med onion, finely chopped
6 oz Canadian bacon, cut into 1/2" strips
4 cups frozen tater tots, thawed
6 eggs, lightly beaten
1/2 cup sour cream (I did not use this because I don't like sour cream)
½ cup half-and-half
1 tbsp dried parsley
¾ tsp garlic powder
½ tsp pepper
1 ½ cups shredded cheddar

Preheat oven to 350.  In large skillet, heat oil over medium heat.  Add onion; cook and stir for 2-3 minutes or until tender.  Add Canadian bacon; cook 1-2 minutes or until lightly browned, stirring occasionally.  Remove from heat.

Line bottom of greased 11x7 baking dish with tots;

top with Canadian bacon mixture. 

In a large bowl, whisk eggs, half-and-half, and seasonings until blended.  Stir in cheese; pour over the top. 

Bake, uncovered, 35-40 minutes or until golden brown.
Nom nom nom.  This smelled amazing.  Tasted great.  We had it with sliced apples and pears.  Oh Nathan hates cheese.  And tater tots.  So he had Canadian bacon by itself, with apples and yogurt.  And a good lunch was had by all.

As long as you carefully check your labels, this is GF.  Ore Ida tater tots are GF.  The Wal-mart store brand was not.  Hormel Canadian bacon is GF (and I didn't check any other ones since the first one I saw was GF).  As you can see, being GF isn't that bad ;)


Gluten Free Pizza Dough

Okay guys this was almost another fail.  I'll show you pictures at the end.  You might wonder why I would attempt another GF thing like this, so closely on the heels of the GF cinnamon rolls that almost made me forget what day it was (Christmas).  Well, it's from the Simply Gluten Free Magazine my sister gave me this fall (the fall baking special) and almost everything in this magazine that I've tried I have been really pleased with.  And, I had bought the stuff for pizza a while back and never made it yet.  AND the two GF pizza dough mixes I have bought and thought were okay (just okay) were $6 for one and $10 for the other (both of them made two crusts each).  And premade GF pizza?  Don't even bother.  Pizza Hut has a GF pizza that will do in a pinch (like if everybody else in your family is getting pizza and you don't want to just watch them eat) but the one in our town closed.  All these things are the driving force behind me trying this recipe.  First the recipe, then the pictures, so I can share my thoughts at each step without interrupting the flow of the recipe...

Gluten Free Pizza Dough
1 ½ cups gluten free all purpose flour, plus more for dusting
1 ½ tsp xanthan gum
1 tbsp active dry yeast
1 envelope unflavored gelatin
½ tsp kosher or fine sea salt
½ tsp sugar or honey
2 tbsp olive oil
2/3 cup very warm water (about 110*)

Preheat oven to 425.

Combine all ingredients in a bowl of an electric mixer fitted with whisk attachment.  Mix on low until combined.  Scrape down bowl once.  Turn mixer to high and mix for 3 minutes.

Dust work surface generously with GF flour.  Knead dough a few times until it is smooth and no longer sticky.  Press dough into pizza pan or baking sheet (use a rolling pin if needed).

Bake for 10 minutes.

Add toppings and bake an additional 18-25 minutes.

Ok so after I combined all the ingredients in the mixing bowl and mixed it on high for 3 minutes, this is what it looked like:
Hmmmmm.  That doesn't look too good.  So I took a rubber spatula and tried to squish it all together to see if it would come together into one ball.
It mostly did.  So I reluctantly proceeded (at this point, well probably before this point, I should have added another tbsp of olive oil to see what would happen...but I tend to stick to the recipe as written the first time I make it...to the point of disaster, sometimes haha).  I turned it out onto my (well dusted) pastry mat and rolled it out into a circle and put it on the pizza stone, then put it in the oven.  Then was like "whoops forgot to take a picture of that."
Baked it for 10 minutes.  Pulled it out and thought "we cannot eat this."  It seemed so dry.  Cracking.  But I had no good alternative for dinner that I could prepare in the amount of time I had left before the hubs got home and then potentially would leave again for basketball (which he didn't make it to, but it wasn't the pizza dough's fault).  So, while mentally preparing my apologies to the family, I proceeded.  I topped it with tomato sauce, a thick layer of mozzarella, and then bacon, onion, and green pepper, then another thin layer of mozzarella.  Then put it back in the oven.  I had stopped taking pictures at that point, because I couldn't bear to share another fail with you all.  Pulled it out of the oven.  Sighed.  The crust looked so dark and dry.  BUT we are troopers, so I cut it into four pieces (Nathan is on an "I don't like pizza kick") and put it on plates.  To my surprise and amazement, this was really good.  Even the kids and the hubs, who eaten gluten daily and glutinous pizza regularly, liked it.  About halfway through my piece, I was like "wow!  I should share this one after all!  Take a picture of your half-eaten piece, self!"  And so I did.  Just pay attention to what the crust looks like.  The cheese is dark, but I love it like that, so I gave myself the burntest piece. 
Now the end parts are the parts that a lot of people leave behind.  I usually eat mine because I love the crunchiness.  The part of this crust uncovered by sauce and toppings you could break a tooth on.  We couldn't eat that part.  But seriously the whole rest of the pizza turned out very yummy.  Shockingly surprised.  A keeper for sure.  But I will try with a bit more oil next time.


Saturday, December 26, 2015

Gluten Free Cinnamon Rolls

I should have known better.  Probably when you saw the title, you winced a little.  But I've been on such a roll lately (get it?) that I thought I could make these.  On Christmas morning.  Thankfully it was just us and my parents, so no Food Network people to try to impress or anything.  And it starts with gluten free Bisquick, which I am pretty much in love with (until this stunt it pulled).  But after trying the recipe, it seems like they just used a regular old recipe and subbed in the GF Bisquick instead of actually trying this.   I couldn't even take pictures to show you how bad it was, #1 due to my hands being perpetually covered in dough and #2 due to my rage.  I shall have to paint word pictures for you.  First, the recipe.  It's from BettyCrocker.com.  Who have no idea what they are talking about or the heartache they cause with willy-nilly cinnamon roll recipes.

Gluten Free Cinnamon Rolls 
1/2 cup packed brown sugar
2 teaspoons ground cinnamon 
3 cups Bisquick™ Gluten Free mix  
1/4 cup granulated sugar 
1 1/4 cups milk 
1 egg 
1/4 cup butter, melted 
1 cup powdered sugar 
1/4 cup whipping cream 

  • Heat oven to 425°F. Spray 9-inch round cake pan with cooking spray (without flour). In small bowl, mix brown sugar and cinnamon; set aside.
  • In large bowl, stir Bisquick mix, granulated sugar, milk and egg until dough forms.
  • Place dough on surface sprinkled with additional Bisquick mix; knead 5 times. Roll dough into 16x12- inch rectangle. Brush with 2 tablespoons of the melted butter; sprinkle evenly with brown sugar mixture. Starting at short side, roll up tightly; pinch edge of dough to seal well. Cut into 1 1/2-inch slices. In pan, place slices, cut sides down. Brush with remaining 2 tablespoons melted butter.
  • Bake 20 to 25 minutes or until golden brown. Cool 5 minutes. Remove from pan.
  • In small bowl, mix powdered sugar and whipping cream until smooth. Spread glaze over rolls. Serve warm.

Okay you can probably guess when it all started going downhill.  I sprinkled like it said.  Rolled out the dough into the approximate shape of a rectangle (with difficulty since the dough wanted to stick the rolling pin very much).  Brushed with butter, sprinkled with reserved brown sugar mixture.  Then.  Could not.  Roll. It. Up.  Family members gathered around to see what I was screeching at.  First it stuck to the pastry mat.  Even though I sprinkled the surface of said pastry mat like it said to.  Then, once I painstakingly could get a few inches of dough off of the pastry mat (using a small rubber spatula coated with GFB) and finally could roll it, it broke.  By the end of it, it by no means looked like a roll.  It was more like a stack of layered dough.  I did smack it a few times for good measure, because it made me feel better to hit it.  If this had been a fail with regular ingredients, I would have thrown it away.  But GFB is like $4/box and it used almost a whole box.  And I am stubborn.  So I proceeded to cut it into slices and gingerly move them, while they are falling apart, into the prepared pan.  They looked funny.  Instead of nice circles, they were more gourd-shaped.  I baked them, figuring they would taste fine even if they were not cinnamon "rolls" at all.  Once they were cool, I did prepared the glaze as instructed.  But then I remembered that I bought Whipped Cream Cheese frosting for $1 at Marden's the other day.  SO.  I knew that would make them more palatable, if they were dry or otherwise unappetizing.  So that's what we had on top of them.  

Needless to say, I will not be attempting this again.  I guess some things you have to do without when you are GF.  Either do without, or pay mega-dollars to buy frozen Udi's ones (which I've never tried before but would consider now)(only for a special occasion like Jesus's birthday, not too often, because I'm not made of money).

Italian Pot Roast

When I think of pot roast, I think of brown gravy and potatoes and carrots.  So this one is a little bit of a different take on pot roast, because the sauce is more tomato-y and it's served with noodles instead of potatoes.  But it sounded yummy.  This is from the Oct/Nov 2015 Simple & Delicious.  One of the things you do at the beginning is put these whole spices into cheesecloth.  I can't remember where I got this cheesecloth, but as a nurse, it was difficult to use this without remembering the dozens and dozens and dozens of wounds I have dressed/packed/dabbed with gauze that looks EXACTLY like this.
So that was weird.  Probably someone is laughing somewhere as they  manufacture gauze that is both for cooking and wound dressing...

Italian Pot Roast
1 cinnamon stick (3 in)
6 whole peppercorns
4 whole cloves
3 whole allspice
2 tsp olive oil
2 lb boneless beef chuck roast
2 celery ribs, sliced
2 med carrots, sliced
1 large onion, chopped
4 cloves garlic, minced
1 cup beef broth or dry sherry (guess which one I used? Yep beef broth)
1 can (28 oz) crushed tomatoes
¼ tsp salt
Hot cooked noodles for serving

Place the cinnamon stick, peppercorns, cloves, and allspice on a double thickness of cheesecloth.  Gather corners of cloth to enclose spices; tie securely with string.

In a large skillet, heat oil over medium-high heat.  Brown roast on all sides; transfer to slow cooker.  Add celery, carrots, and spice bag.

Add onion to same skillet; cook and stir til tender.  Add garlic; cook 1 minute longer.  Add broth or sherry, stirring to loosen browned bits.  Bring to a boil; cook and stir until liquid is reduced to about 2/3 cup.  Stir in tomatoes and salt; pour over roast and vegetables.

Cook, covered, on low, for 6-7 hours or until meat and vegetables are tender.

Remove roast from slow cooker; keep warm.  Discard spice bag; skim fat from sauce.  Serve pot roast and sauce with noodles.
Of course this smelled amazing all day.  And the meat was falling apart, which is just how we like it :)  the noodles I served this with are GF white bean pasta.  I got them at the Natural Living Center.  It's the second time we've had them.  I do like the texture, and they only take 3-4 minutes once the water is boiling.  But they cost probably twice as much as the two other GF pastas I usually buy, and Emma doesn't like these.  So, so long white bean pasta, it was nice while it lasted.  The sauce was very good drizzled over the noodles.  As you can see, we had this with corn, too.  A yummy meal and I'm sure I'll make this again.

This has lots of spices that I happened to have already that have accumulated on my spice rack through the years.  But if you don't have them, I could see not wanting to spend a lot of money to get these all at once.  I hardly ever have to buy a spice any more, but it's been like 10 years since I started doing New Recipe Night so I've had lots of time to gather.  They keep for a looooong time, despite what expiration dates may tell you.  There are a couple that can go bad, but I can't remember what they are...my mother in law told me, and maybe she'll comment on the post.  I think one might have been paprika.  Anyway you could sub with small amount of the dried spices mixed with the broth/tomato mixture before you pour it over the meat and I'm sure the flavor would be about the same.

Tuesday, December 15, 2015

Apple Snickerdoodle Bars

Ok this one was so good that I forgot to take a picture.  And there were no leftovers to take a picture of after the meal, which I sometimes do if I forget.  This recipe is from the Simply Gluten Free magazine my sister gave me.  This recipe is in the dessert section of the magazine, but I thought it seemed more like a coffee cake than dessert.  So we had this for lunch on Sunday, with eggs, bacon & fruit.  I will take a picture of their picture, which I hope is not copyright infringement, but it's not as if I'm trying to pass it off as my own.  I'm telling you right now that this is their picture.  You could very easily make this Glutinous instead of gluten free by using regular flour.  I bet it would still be good.
Apple Snickerdoodle Bars
½ cup butter, melted
½ cup plus 3 tbsp sugar, divided
½ cup brown sugar
1 egg
1 tsp vanilla
1 ¼ cups flour (or GF flour blend)
½ tsp fine sea salt
1 ½ cups peeled, diced apples (I used gala because that's my favorite)
1 ½ tsp cinnamon

Preheat oven to 350.  Grease 8x8 pan.  In a mixing bowl, combine the melted butter, 1/2 cup sugar, and brown sugar, and stir well.  Stir in the egg, vanilla, flour (or flour blend), salt, and apples.  Spread into prepared pan.

In a small bowl, combine the 3 tbsp sugar with the cinnamon.  Sprinkle evenly over the top of the batter. 

Bake for 25 minutes or until the edges start to turn golden brown.  Let cool completely in the pan.

We did not let it cool completely.  So it was a bit crumbly and we had to eat it with forks.  But it tasted so good!  You could really taste the butter and brown sugar.  Nathan said "I'm not going to like this.  You know I don't like cooked apples."  But then he had seconds.  And so did everybody.  Really it was so so good.  We will for sure have this again.

Hearty Tuscan Soup

Have you been to a Pampered Chef show lately?  I went to one in the fall.  Through the years I have accumulated many many PC products.  Several of them I don't know what I would do without (that sounds lame and cheesy but it's true).  One thing I always do when I place an order is order the "Season's Best" cookbook.  It used to be $1.00.  Now it's $2.00.  So, slightly more risky since you don't know if there's anything there that you'll make.  But I took a gamble.  There are two recipes there that I'm going to try.  This one (which is also the recipe that was at the show I went to) and then a dessert one that I'll try later.  These cookbooks are, I realize, mostly just glorified advertisements, to make you think you need this product or this spice blend to complete this recipe.  But you really don't.  So I will tell you their recipe and I'll put my modifications along with it.

Hearty Tuscan Soup
2 cans (15 oz each) pinto beans (they say reduced sodium but I just used regular)
1 tbsp olive oil
8 oz Italian turkey sausage (2-3 links), casings removed
1 onion, diced
1 med sweet potato, peeled and cubed (I prefer white...so I got one large baking potato)
4 cloves garlic, minced
4 cups chicken broth
1 can (14.5 oz) fire-roasted diced tomatoes, undrained
1 tbsp Rosemary Herb Seasoning mix (my stuffing recipe from PC calls for this too and I googled substitutes way back when so I know you can sub 2 tsp dried rosemary, 1/2 tsp lemon peel, and 1/2 tsp garlic powder for 1 tbsp of this seasoning mix, so that's what I did)
½ tsp black pepper
1 pkg (5 oz) fresh baby spinach leaves, washed and dried (I do NOT like spinach so I left this out)
16 melba toast rounds (or GF bagel chips)
3 tbsp shredded Italian cheese blend (or 3 tbsp shredded mozzarella and 1 tbsp shredded parmesan, mixed...that's what I did instead of buy a whole bag of cheese for the sake of 3 tbsp) 

Drain and rinse one can of beans; set aside.  Drain and rinse second can of beans and place into food processor.  Process until almost smooth.  Set aside. (I have a manual food processor from Tupperware (gasp!) that I could have used, but I also have one you plug in, so that's the one I used.  I think you could just mash them like crazy too, but they need to be very well mashed because this is what thickens the soup)

Heat oil in dutch oven over medium heat 3-5 minutes.  Add sausage and cook 4-6 minutes or until no longer pink, breaking into crumbles.

Add onion, potato, and garlic to dutch oven; cook and stir 5-6 minutes or until onion is softened. 

Stir all beans, chicken broth, tomatoes, seasonings, and pepper into dutch oven.  Cover; bring to a boil over high heat.  Reduce heat to medium and simmer, covered, for 10 minutes.


Preheat broiler.  Remove dutch oven from heat; add spinach.  Cover and let stand 2-3 minutes or until spinach is wilted. Top soup with melba rounds; sprinkle with cheese. 


Place dutch oven 2-4 inches from heating element and broil 2 minutes or until croutons and cheese are lightly browned. 


Ladle soup and croutons into bowls.

At the show I couldn't taste the soup, because of gluten, so this is the first time I tried it.  This is what I used instead of melba toast (and who the heck is/was melba anyway??)
And I used way more than 16.  And I ate a few while I was was waiting for Steve to get home too.  Very very good. 

Nathan did not like this soup but everybody else really liked it.  There was enough for 3 servings for leftovers.  Of course the bagel chips kind of got soggy in the leftover portions, but that would have happened with melba toast too.  That is my only complaint about this recipe.  It was very very good and I'm sure we'll have it again.

Tuesday, December 1, 2015

Whoopie Pies

I have, of course, made whoopie pies before.  I am sure most people that grew up in Maine have.  I haven't tried it this exact way before though.  I have a recipe on this blog that I got from Rachael Ray that is for pumpkin chocolate chip whoopie pies, and that is a popular post.  But I think that's the only whoopie pie (henceforth will be called WPs in this post) recipe on the blog.  Two summers ago we went to one of my husband's coworker's homes for a summer party.  There was a pig roast (which was cool, the kids had never seen a whole pig roasted) and a swimming pool and people brought side dishes and desserts to share.  There was a plate of WPs on the table.  I didn't go for them but the kids each got one and they were RAVING about how good they were.  I wrangled one or two of them (it was a long time ago I can't remember all the details) to give me a bite (this is before I was GF), and the filling was PERFECT.  I tracked down the maker of these WPs and asked if she would give me the recipe.  She seemed surprised, and said something like, they're just whoopie pies.  And I said yes but my kids loved them and I don't have a recipe to make them like this.  So.  The following week she gave my husband a page photocopied from a cookbook.  I don't know the name of the cookbook, but it looks old.  She wrote a couple little notes on it for me.  I am sure this is a cookbook at least from New England, because it calls for Fluff, which is a strictly New England thing.  Other places have to use Marshmallow Creme, which everybody who has had both will tell you is not even close to as good.  I don't know why it took me so long to make them, but today was the day.

Also, a note about shortening.  A lot of people shy away from traditional WPs and filling because of the shortening.  Let me tell you my philosophy on this.  I have heard my pastor say many times that fire can be good, or fire can be bad.  In a metal box in your home, fire is good, and heats your home.  If fire is not contained, it is very destructive and can burn your home to the ground.  Now, in WPs, made the Maine way, you have to have shortening.  It's just not right if you don't.  Should you eat shortening off a spoon, or eat it every day?  Certainly not.  But in its proper context, once or twice a year for a special recipe, shortening can be a useful tool.  I hope that was helpful.

Whoopie Pies
½ cup shortening
1 cup sugar
2 egg yolks, beaten
5 tbsp cocoa
2 cups flour
1 tsp baking powder
1 tsp baking soda
1 tsp salt
1 cup milk
1 tsp vanilla
Filling:
¾ cup shortening
¾ cup powdered sugar
1 cup marshmallow fluff
¼ tsp salt
1 tsp vanilla
½ cup peanut butter (Optional)(but of course I used it)

Cream shortening and sugar; beat egg yolks into creamed mixture.  Mix and sift together flour, cocoa, baking powder, baking soda, and salt; add to creamed mixture alternately with milk.  Stir in vanilla.  Drop from dessert spoon onto ungreased cookie sheets, leaving about 3 inches between each cookie. 


Bake at 375 for 8-10 minutes.  Remove at once from cookie sheets to cool on a rack. 


Cream shortening and sugar with fluff (and peanut butter if using); stir in salt and vanilla. 

Spread filling between two cookies. 

Wrap each pie individually in plastic or wax paper.  Store in tins or freezer.  These "pies" are delicious eaten directly from the freezer.

These came out awesome!!  I used a GF flour blend, which can be a gamble in a new recipe.  The pies were a tiny bit crumbly but the taste and texture were amazing.  Even the kids thought so.  So I know that regular flour would be great in these too.  I am of course keeping this recipe. 

A little note about baking stones, in case you thought my cookie sheet was dirty...it's just well seasoned!  As they say at Pampered Chef parties, "the worse it looks, the better it cooks."  I promise it's clean :)  my stones are probably at least 10 years old and I love them and my cookies and baked goods (almost) always come out perfect, and if they don't it's the recipe's fault, not the stone's fault (like the ridiculous oreo cheesecake cookies that I posted, which you can find under "what not to make").  You do have to add a minute or two to the baking time, which can be off-putting to people who don't know that in advance and think their cookies didn't bake as well on the stone as they would on metal cookie sheets.  You just have to bake them a bit longer :)  All we are saying...is give stones a chance...


Sunday, November 29, 2015

Raspberry Cream Pie

This was almost a fail.  And I thought, well, I haven't had a fail in a while, so that should at least make for a good blog post.  But at the 11th hour this pie pulled itself from the jaws of defeat.  It's from the Church Potluck cookbook I'm working through.  I made this on Saturday to bring to a friend's house for lunch on Sunday.  Good thing I didn't just think I could throw it together Sunday morning, then it would have been a fail for sure....

Raspberry Cream Pie
9" baked pie shell (if you use a GF pie shell then this is a GF recipe)
3 oz pkg black raspberry jello
1/4 cup sugar
dash salt
1 1/4 cups boiling water (measure before you boil, then you aren't trying to pour boiling water into a measuring cup...)
1 tsp lemon juice
10 oz pkg frozen raspberries
1 cup heavy cream
1/3 cup powdered sugar
3 oz cream cheese, softened
dash salt
1 tsp vanilla

Combine jello, sugar, 1 pinch of salt, boiling water, lemon juice, and frozen raspberries in a medium-sized bowl (separate frozen raspberries with fork).  Let set until jelly firm (ok this took several hours in the fridge.  The recipe in no way indicates this anywhere....).
Whip the cream and refrigerate until next step.  Combine cream cheese and powdered sugar (I used my Kitchen Aid but it wasn't really enough quantity and didn't combine well...I had to scrape often).  Add other pinch of salt and vanilla.  Beat well and fold into reserved whipped cream.
It doesn't say this, but you better put it back into the fridge, since it will be several hours until you are ready to continue....

In baked pie shell, put 1/2 of the whipped cream mixture, being careful to coat the sides of the pie shell to keep it crisp.
Then add half of raspberry mixture, then the remaining whipped cream mixture.
Finish with raspberry mixture (I didn't use all of it because it seemed precarious at best, since it was still rather runny at this point).
Chill several hours.  The best! (says the cookbook author...keep reading for reviews from actual people). 

Looks yummy, right?  Ok so at the part where you combine the berries, jello, etc, it gives you no clue at all as to how long that's going to take.  I left it on the counter for at least an hour, and the consistency was no different than when I started.  So I decided to refrigerate it and see what happens (which the recipe in no way indicates).  Every time I opened the fridge for any other purpose, I would stir it and see, and it still looked the same.  At supper I said to Steve something like "this pie is going to be a fail, what else can I throw into this already baked pie crust?"  And I was thinking of alternatives and funny things I could say about the recipe when I wrote it up.  Once supper was all cleaned up, I gave it one last chance, and stirred it, and what do you know?  It was more jelly-like.  Still kinda runny...I texted a picture of it to my friend that we would be eating with and told her to cross her fingers because I wasn't sure how this would be.  She was supportive.  By the time we cut into it today, it had gelled the way I would expect.  So, that was a close one.

Also, I secretly used a gluten free pie shell that I had in the freezer.  This way I can test.  Lots of people don't even like the pie crust, and I like to eat what I make.  So by my calculations, if half the people, and especially kids, don't eat the crust because it's not sweet and they just eat the filling, should I make or use a gluten-laden crust that means half the people plus me will not/cannot eat it?  Or should I make or use a gluten-free crust that means the same half of the people won't eat it, but then I can?  That math makes sense to me... My friend, despite having worked overnight last night, is a smart cookie who clued in to the fact that I was eating the dessert and asked about it.  But, she said it was good.  In fact, everybody ate their crust.  Which was good validation for me that I had made the right choice.  Everybody that ate it (which means Not Nathan because it has Real Berries) said it was really good.  A couple of the kids wanted a second piece, but there were 9 people and 8 pieces of pie.  So this is a surprise keeper, because I was prepared to write it off as a loss.

Saturday, November 28, 2015

Banana Blueberry Oatmeal Bake

I've been wanting to try a baked oatmeal recipe for a while, because they always sound so yummy.  But my children are not oatmeal lovers.  They like it in cookies and homemade granola bars, but not in a bowl, hot.  Except two of them like Quaker instant oatmeal.  But they each have their own flavor, and that is the only one they like.  But I thought "I am making this" because we have our own blueberry bushes and I always like to find new recipes to use our blueberries in.  Also my parents were coming over for dinner so I knew at least most of this would get eaten, even if it wasn't a kid favorite.  I told them "everybody has to eat this.  But not everybody has to like it."  It's from the Simple & Delicious that I'm working through.  We had this with potato pancakes (because once again we made way too many mashed potatoes for Thanksgiving), applesauce, orange slices, and of course, bacon.

Banana Blueberry Oatmeal Bake
1 ½ cups 2% milk
1/3 cup honey
1 tsp vanilla
½ tsp cinnamon
1/8 tsp salt
1 ¼ cups old-fashioned oats
2 med bananas, sliced
1 cup fresh or frozen blueberries
Topping
¼ cup brown sugar
2 tbsp flour
2 tbsp butter, softened
½ cup chopped pecans

Preheat oven to 350.  In a bowl, whisk the milk, honey, vanilla, cinnamon, and salt until blended.  Stir in oats.

Arrange banana slices in a single layer in greased 9-in square baking pan; top with blueberries.  Pour oatmeal mixture over the top, spreading evenly. 


Bake 25-30 minutes or until set.  Remove from oven.  Preheat broiler.

For topping, in small bowl, mix brown sugar, flour, and butter with a fork til crumbly; stir in pecans.  Sprinkle over oatmeal.  Broil 7-8 inches from the heat for 2-3 minutes or until lightly browned.  Let stand 10 minutes before serving.

I have no picture of the finished product!  You know how when you are making a bunch of things and then everything is ready all at once and everyone is ready to eat?  That's what happened here, and I forgot until I was putting the (small amount of) leftovers away that I hadn't taken a picture of the end result with the topping on it.  Sorry :(

My parents both ate this and said they liked it.  Steve and Emma both had seconds!  (whaaaaa??? She never does that...and she said she really liked it!).  Nathan would only eat two scraped off banana slices and would not even try a bite with everything in it.  Sam said...eh, not as bad as it could be (he is a big oatmeal disliker).  So, the verdict is, I'm keeping the recipe.  Emma having seconds cancels out Nathan having none, and everybody else's reactions were acceptable.

Tuesday, November 17, 2015

Autumn Apple Chicken

I have a friend that doesn't like to make casseroles, because she doesn't like to cook things twice.  For example, she doesn't like to make all the ingredients for shepherd's pie and then have to cook it in the oven, too.  I tried to tell her she could use the oven time to wash all the prep dishes (or load the dishwasher) and then after the meal you just have the plates and the casserole dish to deal with.  She remains unconvinced. I was thinking of her and her philosophy today when I was prepping this because you have to brown the chicken, then saute the onions, then deglaze the pan...and then cook it for hours in the crock pot.  Haha, I thought, Becky would never do this.  And really this recipe is not the type that you can dump everything in the crock pot in the morning and then have dinner ready when you get home (I do really like that kind though).  This was as much prep work as any dinner, except done after lunch instead of right before supper.  However it worked well for me today because I had a dentist appointment this afternoon, so before I went I prepped everything, then when I got home all I had to do was make the rice and corn.  This one is from Simple & Delicious.


Autumn Apple Chicken
1 tbsp canola oil
4 bone-in chicken thighs (skin removed)
¼ tsp salt
¼ tsp pepper
2-3 gala apples, chopped (I used 3 because my apples were smallish)
1 onion, chopped
1 clove garlic, minced
1/3 cup barbecue sauce
¼ cup apple cider
1 tbsp honey

In large skillet, heat oil over medium heat.  Brown chicken thighs on both sides; sprinkle with salt and pepper.  Transfer to crock pot; top with apples.

Add onion to same skillet; cook and stir over medium heat for 2-3 minutes or until tender.  Add garlic; cook 1 minute longer.  Stir in barbecue sauce, cider, and honey; increase heat to med-high.  Cook 1 minute, stirring to loosen brown bits from pan.  Pour over chicken and apples.  Cook in crock pot on low for 3-4 hours or until chicken is tender.


First I will say this was barely enough chicken and I should have realized that and made 6 thighs instead of just 4.  Good thing we had nobody extra over for dinner.  Also, Nathan did not like this.  Usually he loves chicken made any way, unless it has cheese.  This he did not like.  Due to the nature of the servings, he & Emma split the 4th thigh, so he had maybe 6 bites' worth of chicken and I really had to push him to eat it.  But everybody else really liked it.  The sauce over the rice was so good.  The apples together with the chicken were lip-smackingly-delicious.  We will definitely be having this again.  And poor Nathan will have to have PB&J......don't feel bad for him though.  He actually would prefer that most nights...

Gluten Free Donut Holes

Several weeks ago a friend posted that she had made GF donut holes for her husband (not to be mean...but rather because he is gluten free).  I asked for the recipe and she sent me a link to a recipe on Pinterest.  I have never signed up for Pinterest.  It seems like one more thing to not be able to keep up with/keep track of, and I have plenty of those already.  But it used to be if someone shared a recipe link or a funny nurse meme, I could still click on it and read it.  But not anymore because they think they own whatever that is.  Ok Pinterest food & ingredients have been around for thousands of years but this recipe totally belongs to you now.  Whatever.  So anyway I could not see the recipe, but I still wanted to make GF donut holes.  So I just used my friend google (who still shows me whatever I want) and found this recipe.  It started out using Gluten Free Bisquick which made me very. happy. because I always have some of that.  I get it in 3-packs from Amazon and it is a very reasonable price compared to grocery store prices.  It's a Betty Crocker recipe, and there are a few other ones on that website too that start with GF Bisquick so I will probably make some of those too.  In case you care about preservatives and stuff, the ingredients in GF Bisquick are: Rice flour, Sugar, Leavening (baking soda, sodium aluminum phosphate, monocalcium phosphate), Modified potato starch, Salt, Xanthan gum.  The leavening ingredients are the same as in most baking powders, unless you use aluminum free baking powder, which I usually do, but besides that, this is pretty much the same blend I would make using 2 or 3 separate flours.  So I am completely comfortable using it and it saves me time in the kitchen.  But I digress.  Here is the recipe.


Gluten Free Donut Holes
vegetable oil for frying
¼ cup sugar
½ tsp ground cinnamon
1 ¼ cups Gluten Free Bisquick
¼ cup brown sugar
¼ tsp nutmeg
2 tbsp butter, melted
1/3 cup buttermilk
1 egg, beaten

In deep fryer or 2-qt heavy saucepan, heat 2-3 inches of oil to 375*.  In shallow bowl, mix sugar and cinnamon; set aside.

In medium bowl, mix remaining ingredients until smooth.  Shape dough into 1 1/4-inch balls.  Carefully drop balls, 5 or 6 at a time, into hot oil.  Fry 1-2 minutes or until golden brown on all sides; drain on paper towels.  Immediately roll in cinnamon sugar.

I put the cinnamon and sugar in a gallon size ziploc bag and shook the donut holes in there after I drained them.  Also to get uniform sizes I scooped them using my Pampered Chef cookie scoop. I made a double batch because two of the kids (and the husband too) had a friend over and I wanted to make sure we had plenty.  We had this with eggs, bacon, sausage, and sliced apples and oranges.

I do not have a deep fryer, although I have been pondering purchasing one for such times as these.  Steve's friend was like "Do not do that.  It is a terrible idea.  All of a sudden you'll gain 15 pounds and you won't know why."  But I think I know why.  If it was too easy to make things like this I'm sure I'd do it more.  My main motivation for wanting one is to keep the temperature of the oil uniform.  I have a candy thermometer that I use to tell the temperature of the oil, but it is not designed for it and I've broken two cheap Walmart ones doing that.  I think if I had one I would only use it a few times a year, like when we have Haitian food and fry plantains, or like one time I tried to make homemade corn dogs but that was a total fail.  And for things like this.  Some of the donut holes turned out perfect, but some of them were still a bit doughy in the middle but definitely done on the outside.  Maybe a little too. done.  But you couldn't tell once they were coated in the cinnamon sugar. 

I'm going to try this dough again but I'm going to try baking them next time.  I have some donut pans, or you could try it in muffin tins too, and then roll them in melted butter and cinnamon sugar to get the same effect.  Mmmmmmmm.

Thursday, November 12, 2015

Six-Layer Dinner

This was tonight's supper, and it was pretty good!  It's from the church supper cookbook my mom gave me that I've been working through.  The tagline of this recipe says it's "easy, good, inexpensive, and nutritious."  She got 3 out of 4, I guess.  One of the layers is ground beef, which is not inexpensive.  I buy grass-fed beef in bulk from Siberia Farms every few months, and doing it that way makes it be only a tiny bit more expensive than the grocery store ground beef, which is not as healthy.  So I justify spending a bit more on grass-fed, but it's still expensive no matter what the cow was eating prior to his/her demise.  Also, I used my sweet new food processor to slice the potatoes nice and thin, and I think if I didn't have one (or a mandoline slicer thing would work too), then this would have been less easy.  So if you don't have one of those, then this lady's tagline is only 2.5 out of 4 correct for you.  The "good" and the "nutritious" I have no issues with, she is right.

Six-Layer Dinner
2 cups sliced raw potatoes
½ cup raw brown rice (I used white because that's what I had and it was fine)
1 cup sliced onions
1 lb ground beef, browned
2 cups shredded carrots
1 green pepper, seeded and chopped
1 cup chopped celery
½ cup wheat germ (of course being GF I didn't use this so I googled replacements and one was flax meal which I already happened to have so I used that)
4 cups tomato juice
shredded cheese for serving, (Optional)

Preheat oven to 325.  Combine carrots, green pepper, and celery in a bowl; set aside.  Place potatoes in bottom of greased casserole dish (it didn't say size so I guessed and used 11x7...it was not big enough...you should use a 9x13).  Sprinkle with rice.  Cover in layers with the onions, beef, vegetable mixture, and wheat germ/flax meal.  Pour tomato juice over all. 


Cover tightly with foil and bake 2 1/2 hours.  Sprinkle with cheese just before serving if desired.


By the time I realized my chosen casserole dish wasn't big enough, it was too late.  I was too deeply into the layers.  I was afraid if I tried to transfer to a 9x13 that the layers would all mix.  I am too....I don't know....but too "something" to allow that to happen.  So I pressed everything down in and then put a cookie sheet on the rack below the casserole dish, figuring it would boil over some.  It did.  And burnt on badly. Now I have to scrub/soak/scrub/soak/scrub/soak that cookie sheet.  A couple more times and I'm just going to have to throw it out and get another one.  Which would make this recipe even less not inexpensive than it was.

Everybody liked this, although everybody except Steve & Sam picked around the things they didn't like (I mostly didn't eat the green peppers, Nathan & Emma didn't like the celery, onions, or green pepper).  However, Nathan asked for seconds of this, which is almost unheard of for him.  He also asked for thirds but he had somewhere to be, so no time for that.  We also had to add salt to the final product.  I'm sure it could be added at some point during assembly, but I'm not sure where.  Probably better to just let people salt it to taste while they're eating it.  Very yummy and we will have this again, I'm sure.  Especially since Nathan said this is what he wants for his next birthday meal (which is September.......).

Tuesday, November 10, 2015

Cranberry Apricot Chicken

We had this for dinner last night.  We had a friend over who eats Paleo (for the uninformed, which I was until recently, it basically means no grains at all...so no gluten [which I'm pretty adept at by now], but also no rice, no corn, no oatmeal...just meat, dairy, fruits, and veggies...) and I already was planning to make this one later in the week but bumped it up to last night.  We had this with homemade potato wedges and green beans.  It's from the Simple & Delicious I've been working through.

Cranberry Apricot Chicken
1 ½ lbs chicken tenderloins (I used boneless skinless chicken breast halves cut into 3 or 4 strips each)
¼ tsp salt
2 tbsp olive oil
1 onion, chopped
¾ cup chicken broth
½ cup dried cranberries
½ cup apricot preserves
1-2 tbsp apple cider vinegar (I always like to use less vinegar...the recipe says 2 tbsp but I only used 1)

Sprinkle chicken with salt.  Heat oil in a large skillet over medium-high heat and brown the chicken on both sides.  Remove from pan.

Add onion to same pan; cook and stir over medium heat 2-3 minutes or until tender.  Stir in chicken broth, cranberries, preserves, and vinegar; bring to a boil.  Reduce heat; simmer, uncovered, 2-3 minutes or until slightly reduced. 


Return chicken to pan; cook, uncovered, 4-6 minutes longer or until chicken is no longer pink, turning chicken halfway through cooking time.

Looks yummy right?  The wedges were actually SO good.  The chicken was too.  There was a lot of sauce which I think would have been yummy over rice, too, if you are not eating with any Paleo people.  This was an easy one and yummy too so we'll have this one again, I'm sure.

Sunday, November 8, 2015

Gluten Free French Bread

Ok if you're still reading this, you're probably gluten free.  Or someone you love is.  Or you are a devoted fan.  :)

I think bread is the thing that I miss(ed) the most by being GF.  You can buy packaged GF bread that is acceptable for toast and sandwiches.  But to make bread from scratch, without a factory, seems daunting.  I decided to try this recipe, because it has a lot of steps, but didn't really sound complicated.  Before I read this recipe, I did not know there was such a thing as a French bread pan.  But, there is!  And I bought it!  It cost $14 on Amazon. 

It does seem a bit silly.  Steve says he could have made me one out in the barn but I have my doubts about how the uniformity of the dots would have been.  I really wanted the bread to turn out right so I bought it.  And now that I've made the bread and it was AWESOME I know I will use it a lot more times.  This recipe came from the Simply Gluten Free magazine.

Gluten Free French Bread
2 tbsp active dry yeast
2 tsp sugar
1 ½ cups warm water
3 tsp xanthan gum
2 tbsp olive oil
3 cups gluten free all purpose flour
1 ½ tsp fine sea salt
2 eggs, lightly beaten
1 tsp apple cider vinegar
2 tsp cornmeal
2 tbsp butter, melted

Combine the yeast, sugar, and warm water in a medium bowl and whisk to dissolve the sugar.  Let sit for 5-6 minutes (10 if the yeast has been refrigerated) or until it is foamy and doubled in size.

In a small bowl, stir the xanthan gum with the olive oil until the xanthan gum is dissolved.

Combine the flour and salt in the bowl of a mixer fitted with a whisk attachment or regular beater (not the dough hook) and mix to combine.  Add the yeast mixture, xanthan gum mixture, eggs, and vinegar and mix on low to combine.  Scrape down the sides of the bowl once.  Turn the mixer to high and mix for 3 minutes.

Spray a French bread pan with 2 forms with cooking spray.  Place pan on a clean kitchen towel.  Sprinkle the cornmeal along the bottom of each pan. 

Spoon the batter equally into the forms, and shape into loaf shape using spatula.  Using a sharp knife, cut 3 or 4 diagonal slashes on top of each loaf.


Cover the loaves with a clean kitchen towel and let rise for 30 minutes.

Place a baking pan on the lowest rack of the oven and fill it with about an inch of really hot water.  Position the rack you will bake the bread on in the middle of the oven.  Preheat oven to 400.

Brush the tops of the loaves with the melted butter and bake for 40-45 minutes or until the loaves are golden brown and sound hollow when tapped.  Let cool in the pan for 5 minutes, then remove to wire rack to finish cooling.

We had this with Savory Minestrone soup, which is so yummy.  Steve has a friend that helps him with all kinds of projects around here, and he eats with us a lot as a result of that.  He never says anything critical about my experiments, and also always cleans his plate.  Which is commendable.  I told everyone that this was gluten-free bread.  He took a bite and said...."It tastes like...bread."  Wow.  Music to my ears, truly.  We all felt the same way after we started eating it.  Everyone had two pieces, which no one is obligated to do.  It really was the taste and texture of regular french bread.  And all because of my special pan.  Oh yeah.  This is definitely a recipe I'll make again.  So so so good.


Pumpkin Maple Scones

I do love fall baking.  Last fall there was definitely no charm.  I was newly gluten free and just SAD.  Isn't that silly, to be grieving food?  But I was.  I am thankful to be on the other side of that, and have 14ish months of gluten free cooking and baking under my belt.  I feel like this fall I've been excited to cook and bake again, and a lot more confident than I was this time last year.  I'm sure part of that is that I forget what flour tastes like :)  so these facsimiles thereof seem really good, when maybe the regular people wouldn't think so.  The peeps in my family have been so good about trying whatever I make and giving good feedback.  And I got a good GF flour blend recipe from a friend that has been awesome in muffins and quick breads.  This scone recipe is from the Simply Gluten Free Fall Baking magazine my sister gave me last month.  You could easily make these be "regular" by using all purpose flour in place of the gluten-free flour.

Pumpkin Maple Scones
2 cups gluten free all purpose flour (or regular all-purpose flour)
1/3 cup brown sugar
1 1/2 tsp baking powder
1/2 tsp kosher or fine sea salt
1 tsp cinnamon
1/4 tsp nutmeg
1/4 tsp ginger
1/4 tsp cloves
1/2 cup cold butter, cut into small pieces
1/2 cup canned pumpkin puree (not pumpkin pie filling)
1/3 cup heavy cream
1 tsp vanilla
Glaze:
1 cup powdered sugar
6 tbsp maple syrup

Preheat oven to 425.  Line a baking sheet with parchment paper or silicone baking sheet.

In a food processor (which I have now because my dear husband got me one for our anniversary woot), combine the flour, brown sugar, baking powder, salt, cinnamon, nutmeg, ginger, and cloves.  Pulse several times to combine (if you don't have a food processor just stir it...that part is easy).  Add butter and pulse quickly 8 to 10 times or until flour resembles coarse meal with some larger pieces of butter remaining (you can just use a pastry blender and do this by hand, too...it's harder but also cheaper).  Add pumpkin, cream, and vanilla, and pulse a few times to combine.  Do not over-process, or dough will be too sticky.

Flour a work surface and dump the dough onto it.  Knead dough 2 or 3 times to bring it together.  Pat the dough into a circle about 9 inches in diameter and 1/2 inch thick.  Cut dough into 8 triangular pieces (like a pie) and place on prepared baking sheet.

Bake for 15 minutes or until the scones are browned and feel firm to the touch.  Let cool slightly while making the glaze.

Whisk powdered sugar and maple syrup together until smooth and no lumps remain.  Spoon (or drizzle) the glaze over the scones, letting some of it drizzle down the sides.

My dough was too sticky, I could tell.  So I patted it into a circle and cut it up right on the parchment paper on top of my baking stone.  Because I thought I would never get them transferred over to it without them falling apart.  It was just the two older kids and I eating these.  Emma didn't like them.  I had some extra glaze so she completely smothered hers and was able to eat it.  Sam really liked these though and had two.  I thought they were good, but not amazing.  We had it with scrambled eggs and oranges.  So it was a good breakfast-for-supper meal overall.

Gingerbread and Pumpkin Cream Trifle

Perfect fall dessert.  But my husband does not like pumpkin.  So weird.  The kids used to not like it either, but I am slowly turning them.  I made this to bring to home fellowship on Friday, because otherwise we would eat it all ourselves and that is not good.  This is from the Oct/Nov 2015 Simple & Delicious.

Gingerbread and Pumpkin Cream Trifle
1 pkg (14.5 oz) gingerbread cake/cookie mix (I used my usual gingerbread recipe.  And I made it gluten free and didn't tell anyone til after, and then I only told 3 people ha)
1 pkg (3 oz) cook-and-serve vanilla pudding mix
1/4 cup brown sugar
1 2/3 cups canned pumpkin pie mix
1 carton (8 oz) cool whip, thawed
Caramel sundae syrup for topping

Bake gingerbread according to package directions; cool on wire rack.  Cut into 3/4-inch pieces.

Prepare pudding mix according to package directions; stir in brown sugar and pumpkin pie mix.  Transfer to a bowl; refrigerate 30 minutes.

Layer half the cake, half the pumpkin mixture, and half the cool whip into a 3-qt trifle dish.  Repeat layers.  Drizzle with caramel sundae syrup.  Cover and refrigerate 4 hours before serving.


This was my first experience with cook-and-serve pudding vs using instant pudding.  I'm not sure what the rationale is for using this instead of instant.  But I could definitely tell a difference in the texture.  I didn't love the pumpkin layer.  But Nathan (and some other kids too) said that was the best part.  As for the gingerbread layer, gluten free baked goods tend to be a bit drier than traditional ones, so I figured it would be good in a recipe like this and I was right.  I have a really good GF flour blend anyway and I've been having very good luck with it lately.  If you've read my blog for any length of time then you know that I try to be a sneaky cook, like a spy.  So I made sure to not eat any of this until everyone had been served, because then the observant would have guessed that it was gluten free.  So then I ate some and stood by my friend.  She was pleasantly surprised when I said it was GF.  Or at least she played the part well.  Sometimes I see the plates of children and see that they did not like my dessert because it is still there after the Oreos and cupcakes are gone.  But it seemed like most of this was eaten.  If I make it again, I will use instant vanilla pudding instead of cook-and-serve.  But otherwise a good one.

Pork Carnitas Tacos

The week after Sam's surgery my  husband had to go to Texas for a week for training for work.  He had to.  The only week that would have been worse for this would have been the week OF Sam's surgery.  He was gone 8 days.  He brought  me back this cookbook.


He got this in Texas, even though it's from the Sante Fe (New Mexico) school of cooking.  But probably Tex-Mex is the same both places; they are pretty close on the map.  Whenever I go to a Mexican restaurant I get carnitas.  They are good at Las Palapas but I don't know if they're gluten free, and I'm afraid to ask them if they are because there is a language barrier there and I worry they won't know what gluten is and they will agree with me and I will eat the food and get sick.  BUT at Miguel's, they have a lot of gluten free choices and carnitas is one of them.  So I like to go there and eat SO MANY chips and salsa that by the time the carnitas come I can barely eat any but they are so good that I make myself.  So when I saw carnitas in this cookbook it is the first thing I wanted to try.  An ambitious first choice considering I don't have any of the special Mexican ingredients.  But I thought I would omit and modify as I went.  Here is the recipe and my modifications.

Pork Carnitas Tacos
2-2.5 lb pork stew meat or trimmed pork butt, cut into 1-inch cubes
4 ounces lard (um.  I used butter)
1 tsp coarse salt
1 ancho chile, toasted, stems and seeds removed, and ground to powder (about 1.5 tbsp)(omitted by me)
1 guajillo or New Mexico red chile, toasted, stems and seeds removed, and ground to powder (about 1.5 tbsp)(omitted by me)
scant tbsp ground chipotle pepper (added by me instead of the two above peppers)(this was a mistake)
1 tsp ground toasted cumin seed (I used the cumin powder I already had)
6 whole allspice
3 whole cloves
6 cloves garlic, peeled
2 bay leaves
1 cup Coca-Cola (they say do not substitute anything else for this, so I didn't)
2 1/2 cups meat broth or water
1 whole orange
Flour or corn tortillas

Heat lard in heavy saucepan until hot (don't use a pan that is too broad; a 10- or 12-inch bottom will keep the ingredients from spreading too far)(that was from the recipe not from me). 

Toss pork pieces with salt, ground chiles, and cumin.  Cook in lard for 8-10 minutes, turning frequently to evenly brown.

Add allspice, cloves, garlic, and bay leaves, then the Coke (TM), broth or water, and whole orange.

Bring to a full boil, then reduce heat to just boiling.  Cook, stirring occasionally, until most of the liquid has been absorbed and the lard is beginning to sizzle, about 1 1/4 hours.  The meat should be fork-tender; if not, add more water and continue cooking (mine was ready at this point...I tried a bite of the meat.  I could taste the spices and the orange, and there was just a hint of heat.  I thought "oh good").

Remove orange, turn up heat to medium high, and saute meat while stirring until pieces are well browned with carmelized edges (it didn't say to remove the bay leaves, allspice, and cloves, but I did because who wants to bite down on that??).  Remove from pan and drain well.

Serve with assorted condiments and fresh tortillas (at Miguel's they always serve with with refried beans sprinkled with queso fresco and rice on the side...I did the beans but not the cheese or the rice).

Okay by the time I got to the end of the recipe, it was SO spicy I couldn't eat it.  I tried really hard.  I tried it by itself--big mistake.  I tried a teeny bit with a lot of refried beans.  Nope.  I tried it with a tortilla chip.  It didn't matter.  Way. Too. Hot.  Surprisingly though the hubs and two older children LOVED it.  They ate all theirs, finished mine, got seconds.  I did not expect that at all.  The texture was pretty much what I've had.  But I couldn't even taste the spices at all like I could before the sauce reduced and the meat fried.  It was just hot hot hot.  If I ever make this again it will be with no type of chile pepper or whatever at all.  It's not even spicy at Miguel's.  I see no reason why food should hurt.  I've never understood that.  My dad likes things so spicy that he's not happy unless he's crying at the table.  He's all blowing his nose and stuff between bites.  I just cannot get on board with that.  Order spicy stuff at a restaurant, husband and children.  Just like you have to order seafood or anything with mayo.  You won't be (knowingly) getting that from me...........


Sunday, November 1, 2015

Sante Fe Chicken & Rice

We had this for lunch today after church.  It's from the latest Simple & Delicious that I've been working through. I have no idea if they actually make their food like this in Santa Fe.  This recipe name has not been fact-checked.  And the lady that submitted it is from Texas.  So that's confusing.  But anyway.  In the magazine, the recipe is for 2 servings, but I doubled everything...I'll type it out the way that I prepared it.


Santa Fe Chicken & Rice
1 tbsp butter
1 cup chopped onion
1 1/3 cup chicken broth
1 cup salsa
¼ tsp garlic powder
1 cup uncooked long grain rice
4 boneless skinless chicken breast halves
2/3 cup shredded cheddar cheese

In a skillet, heat butter over medium-high heat.  Add onion; cook and stir until tender. 

Add chicken broth, salsa, and garlic powder; bring to a boil.  Stir in rice; return to boil.  Place chicken over rice.  Reduce heat and simmer, covered, 20-25 minutes or until rice is tender and chicken is 165, turning chicken halfway through.

Remove from heat.  Sprinkle with cheese.  Cover and let stand until cheese is melted.

So easy, and I love that it all cooks in one skillet so clean up was easy, too.  When I saw this recipe I was thinking it would be easy, and yummy, so I'll make it.  I did not expect the reactions I got from the kids...they all loved it!  Nathan said it was the best thing I've ever made (he says that a lot though, if he's eating something he really likes...but still).  You may notice in the picture that one piece of chicken is cheese-less.  Because we have a cheese hater here.  I have tried sneaking it in but he can always tell.  So I make allowances when I can easily.  We will definitely have this again.  It was so good and so easy.

Wednesday, October 28, 2015

Garlic-Ginger Turkey Tenderloins

We had this on Sunday, for lunch after church. Now that I'm not working Sundays, I can cook things that take longer than 7 minutes to prepare.  This recipe came from Simple & Delicious Oct/Nov 2015.  They served it with what looks like maybe kale, I'm not sure, but it's definitely green.  We had ours with brown rice and mixed veggies.  I always buy mixed veggies without lima beans, because when I was little I hated picking the lima beans out of my mixed vegetables.  Mom always let me pick them out, though, which is weird, since she  made me eat so many other things.  Maybe she doesn't like them either....


Garlic-Ginger Turkey Tenderloins
3 tbsp brown sugar, divided
2 tbsp plus 2 tsp soy sauce, divided
2 tbsp minced fresh ginger
6 cloves garlic, minced
1/2 tsp pepper
1 pkg (20 oz) turkey breast tenderloins
1 tbsp cornstarch
1 cup chicken broth

Preheat oven to 375.  In a saucepan, mix 2 tbsp brown sugar, 2 tbsp soy sauce, ginger, garlic, and pepper.

Place turkey tenderloins in 9x13 dish sprayed with cooking spray; drizzle with half of the soy sauce mixture.  Bake, uncovered, 25-30 minutes or until 165.

Meanwhile, add cornstarch and the remaining brown sugar and soy sauce to the remaining mixture in saucepan; stir until smooth.  Stir in chicken broth.  Bring to a boil; cook and stir 1-2 minutes or until thickened.  Slice turkey; serve with sauce.  4 servings

So, turkey tenderloins are expensive, it turns out.  Mine was like $9.something for two of them. You could easily do this with chicken breasts if you like the sound of the sauce.  I cut each tenderloin in half, and it still took closer to 40 minutes for them to get to 165. 

For the ginger, I don't buy gingerroot (I did that once and it sat in the fridge for like 5 months before I just threw it away...it's pretty cheap to buy that way though).  I either buy it in the fresh vegetable aisle, near the fresh herbs and spices, and they sell it in a thing like a toothpaste tube and it's all minced up.  Or, I buy it near the frozen vegetables, in a little tray that has cubes of it all minced up (you can get cilantro either of these ways, too).  I do have powdered ginger in my spice rack that I use if the recipe says ground ginger, but if it says fresh, that's how I do it.  Also, if your soy sauce is gluten free, this is too.  I am really appreciating recipes I don't have to alter and wonder about to make them GF.

So this was pretty good.  The sauce was good over the rice.  I cut it like I did in the picture because we had a (somewhat) unexpected guest for lunch, and this way I could cut all the turkey like that, and then divided it among 6 plates, and nobody even knows I only had 4 halves to start with.  Pretty sneaky, and all part of being a Sneaky Peeky Spy in the kitchen.